26-Oct-2015
NucTracer is a simple project that analyses fluorescent peaks in multi-channel images of bacteria.
It can be used where cells are too crowded to be detected in phase contrast.
Rather than finding cell contours, DAPI stain is used to localize the centers of individual cells.
- See also ChainTracer
Norbert Vischer
Bacterial Cell Biology
University of Amsterdam
Features
- uses DAPI stained channel to mark fluorescent maxima
- samples peak fluorescence in all fluorescent channels
If not done yet, install ImageJ from: http://imagej.nih.gov/ij/
If the ObjectJ plugin is already visible under menu Plugins, jump to (4).
Otherwise, you can install ObjectJ as follows:
Download objectj_.jar from
https://sils.fnwi.uva.nl/bcb/objectj/download/current/
Make sure objectj_.jar was not renamed (because an older version already existed in the download folder).
Drag objectj_.jar onto ImageJ's main window (which contains the tools).
Confirm when ImageJ asks to store this plugin in the plugins folder, and relaunch ImageJ.
You can choose Plugins> ObjectJ to make the ObjectJ menu visible,
but the ObjectJ menu will appear anyway the first time you open an .ojj project file.
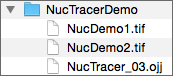
Download and unpack the folder 'NucTracerDemo', which contains two hyperstacks. We will use it as our 'project folder'.
Download and unpack the project file 'NucTracer-xx.ojj' and store it in your local project folder.
Your project folder will then look similar to this:
In order to open NucTracer-xx.ojj, you can either drag its file icon from the Finder/Explorer into the main window with title "ImageJ", or you can use ImageJ's Open menu.
If the ObjectJ menu (between Analyze and Plugins) was not visible yet, it should appear now.
Now the project window is shown, with the panel for linked images still being empty.
In order to link the two files NucDemo_1.tif and NucDemo_2.tif, go to the Finder/Explorer and drag their icons into "Linked Images" panel. Alternatively, you can link images via menu ObjectJ>Linked Images.
The two green bullets confirm that the image files are in the same folder as the project.
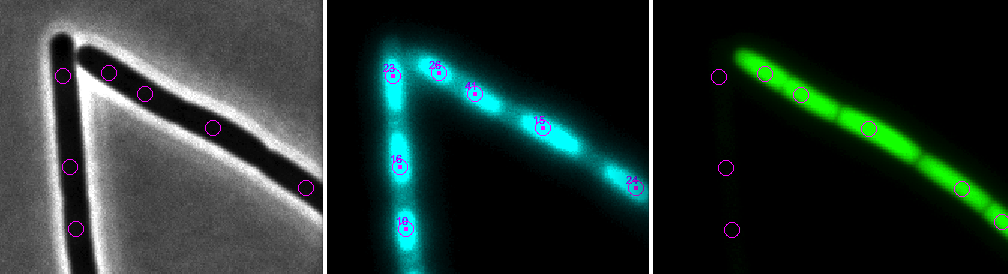
The hyperstacks used here contain several channels and frames. Channel 1 (gray) is used for phase contrast, channel 2 (cyan) for membrane staining, and channel 3 (green) for GFP.
Now you can start with the analysis, using the embedded macro commands under ObjectJ menu.
Choose ObjectJ>Mark Cells in DAPI [1] This is the first embedded macro.
It measures and marks all DAPI images contained in the two hyperstacks by setting markers onto fluorescent peaks.
Choose ObjectJ> Measure GFP and DAPI [2]
Using the markers from the previous step, teh mean intensitisz inside circles are recorded in GFP and DAPI channels
Choose ObjectJ> Show/Hide Circles [3]
Visualises the circular selections which are used to calculate the mean fluorescence per cell.
Choose ObjectJ> Show ObjectJ Results
Shows linked results. For statistics, click on "Stat". For histograms, sorting or other column operations, right-click a column title.
| Column | Explanation |
|---|---|
| FluorGFP | Mean GFP fluorescence inside each circle |
| FluorDAPI | Mean DAPI fluorescence inside each circle |